Decals: THE FINAL TOUCHES TO YOUR BOW RESTORATION
by
Larry Vienneau
Before you refinish your bow carefully measure the area
where the decal will sit and measure the decal itself.
When your bow is 90% refinished, you can begin thinking about decals. If you're lucky, you just need to polish and clean it. If you're thinking about decals, you're likely to have to refinish your bow completely. If you haven't started refinishing yet, I recommend reading these tutorials before you start thinking about decals.
Here is my article on restoration:
other great tutorials
OK, now that your bow is completely prepared you can think
about the decals. There is a great guy who makes the perfect decal for vintage
bow fanatics like us.
Al's Decals
Al Harford, acaah@aol.com 734-856-2591. The subject line of your email should have "decals"
another new option arrow.wood@seznam.cz , name Jaroslav Kejval, Czcech Republic
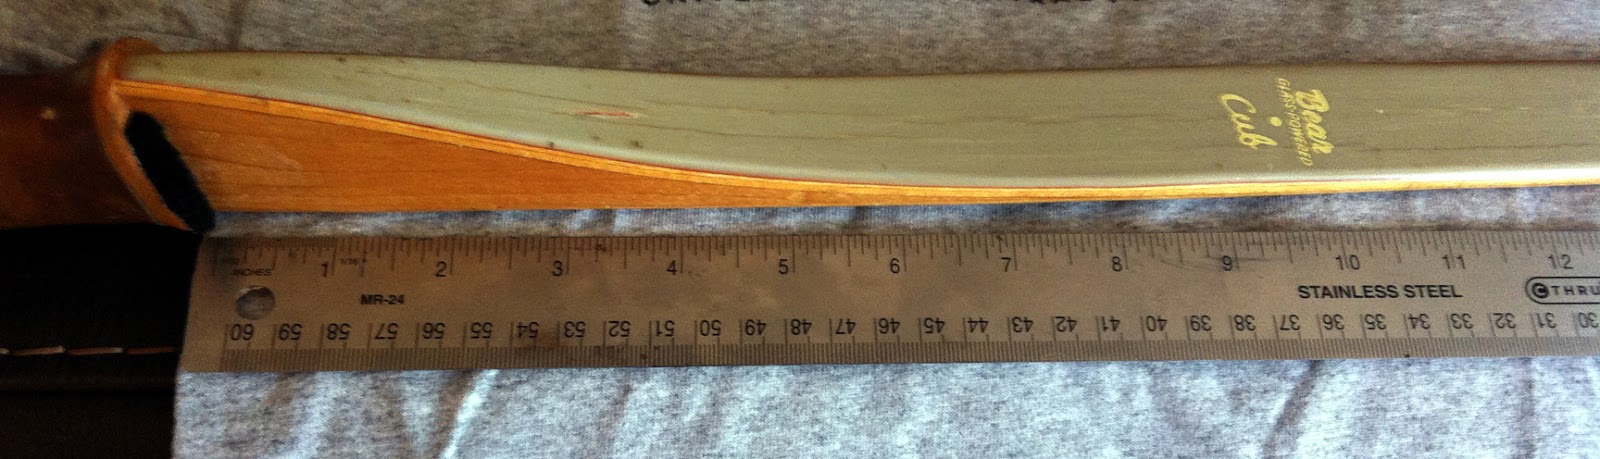
The most popular decal he reproduces is Bear Bow decals, but he also offers others. He does not have a website; he makes these fantastic decals as a hobby. You can contact him by phone or email. Al told me that he had decals for my 1957 Bear Cub. The Cub was in fair to poor shape when I got it and I collect Shakespeare Root bows along with a few Bear Bows. There were deep stress cracks on the belly, a cut mark on the belly, and slivers of fiberglass were visible through the deteriorated finish on the bow's back. The riser, however, was in great condition and the leather wrap was in excellent condition, so it was the ideal candidate for Loctite 420 treatment. Loctite 420 is injected into the cracks until they flush with the fiberglass. You will have to provide Al with excellent high-resolution photographs if you want other makers' decals. (watch out for glued fingers!) Holding down the splinters on the bow's back was also helpful. This can be difficult if you don't have a bow with one of the decals. If you have a friend with that decal, you will be in luck. Otherwise, you will have to search the internet for a clear high-quality image. He prefers PDFs or TIFFs. If you are not Photoshop savvy, he will use a good-quality JPEG.

Again before you
refinish your bow you need to carefully measure the area where the decal
will sit and measure the decal itself.
You will need to search for logos and tweak your photos after you have them if you want to do a good restoration. Al has some Shakespeare decals, but none of the X-bow logos.
Don't worry, Al will let you know exactly how to order your decals. If not, you will have to special order them.
His shipping is very fast, once you receive your decals, read his very detailed instructions.
Your decal will come with a protective backing, set it aside;
you will need it later in the process.
You will need a hard object to burnish the decal and a
roll of blue painter's tape. The tape keeps the decal in place. Make sure you
have lightly sanded the area with 600 sandpaper and make sure it is clean and
free of dust to assure a good bond. Measure the spot on which you want the decal to
be placed.
Carefully begin to burnish the decal. You will see a change
in color as it transfers. Lift the decal to see if it has transferred, if
not, simply re-burnish.
Next place the protective piece of paper which came with the
decal over the transferred decal. Lightly burnish again. This will assure a
smooth-looking decal.
Check to make sure the logos are flat with no bubbles.
Now your bow is ready for the final coats of finish.
Sometimes you might not have the time to do the bow
restoration, refinishing, and then decal application. The decals have a shelf
life of about 1-2 years. Older decals dry out and are hard to transfer. Monte “Inrut”
from Tradrang.com posted his simple solution to dried decals: “I have a
solution to the self-life problem that worked for me on the last two sets that I
applied. My transfers are over one year old. I VERY lightly sprayed Elmer’s
Craft Bond off the back of the transfer. I'm talking about a fine sweeping mist. I
then let it dry for about 15 minutes and applied the decal as per the instruction
sheet. The transfers worked just like they did the first time I bought them.”
Enjoy!!!!!
Books:
Rick Rappe- Vintage
Bows 1, II, and III
Professionals
Restorers:
BowDocs Bow Restoration business is now-
Prairie Traditions Co. owned by Joe Lasch
The Bow Hospital owned by John Rafferty
© Copyright, Larry Vienneau Jr.
All rights reserved.